


How to Adjust Your Harley-Davidson Rear Shocks for Maximum Comfort
Every Harley Davidson rider knows that the journey is just as important as the destination. But if your rear shocks aren't properly adjusted, even the smoothest highway can feel like a washboard.
Many riders unknowingly suffer through uncomfortable rides simply because they've never taken the time to dial in their Harley's rear shocks adjustment settings. Whether you're experiencing excessive bottoming out, a harsh ride quality, or that bouncy feeling that makes long trips exhausting, the solution often lies in understanding how to properly adjust your rear suspension.
The good news? You don't need to be a master technician to achieve maximum comfort. Just a few strategic adjustments can transform your riding experience.
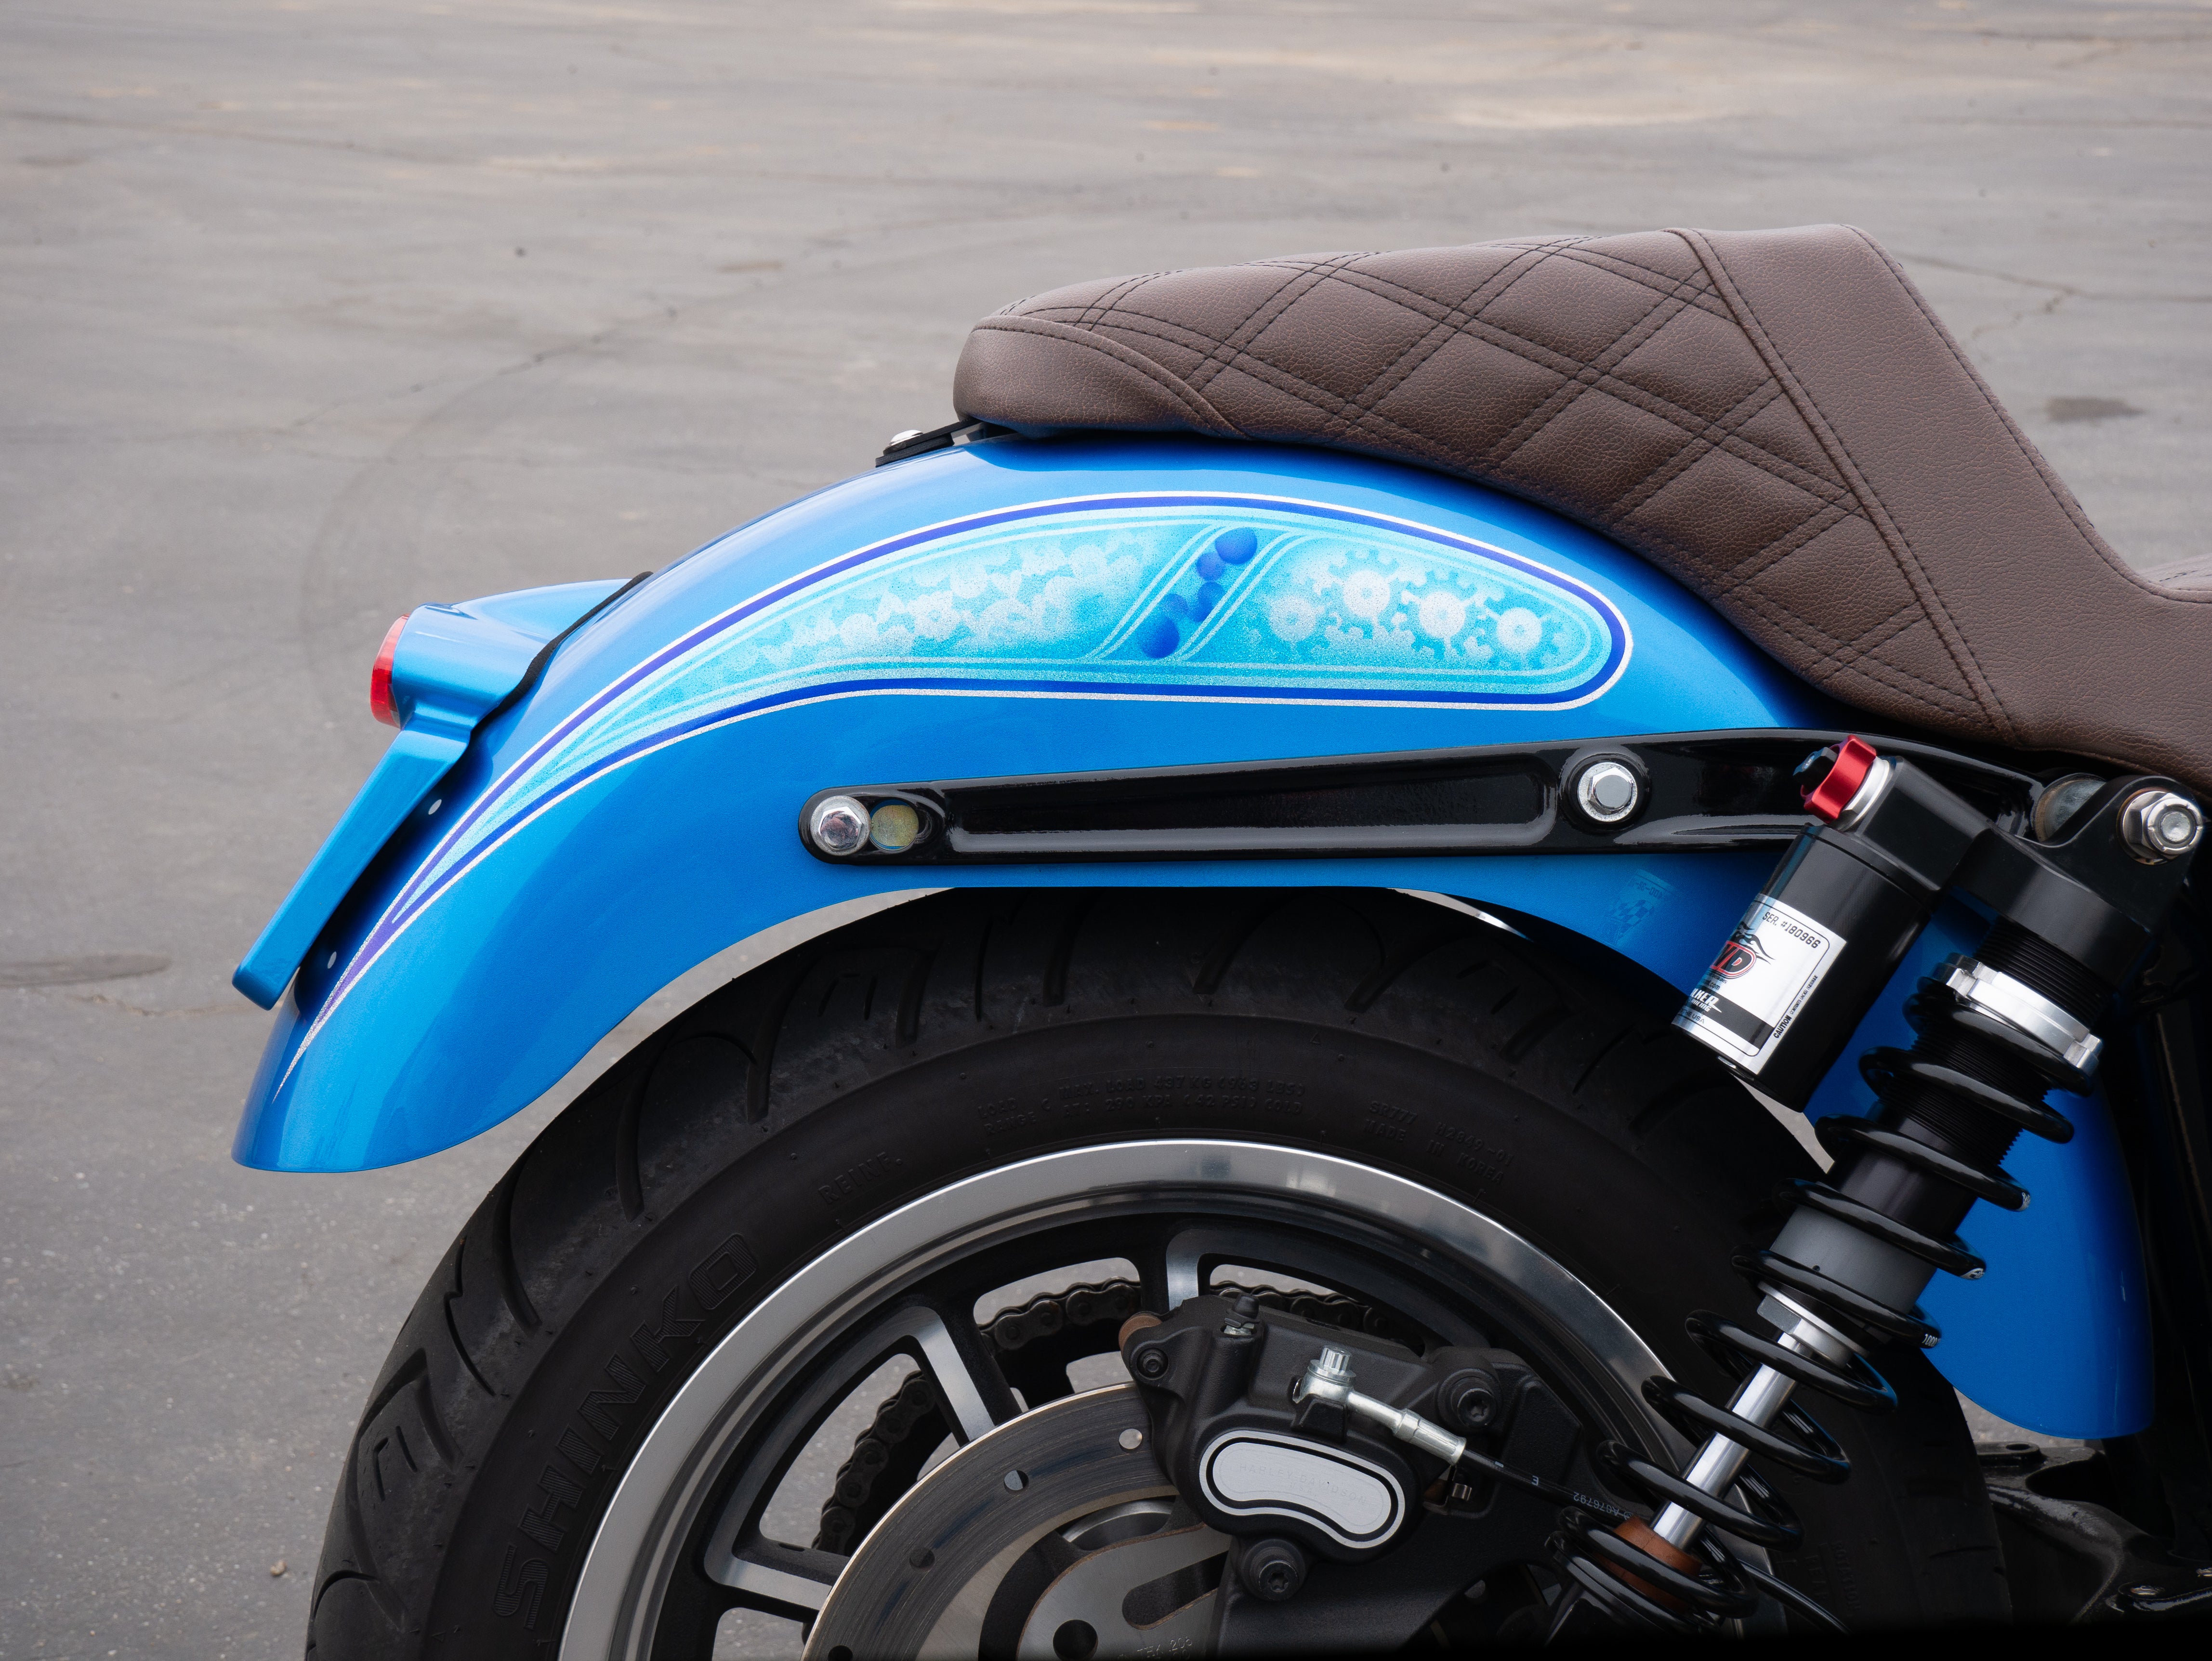
At RWD V-Twin, we've helped countless Harley owners unlock the full potential of their Harley Davidson suspension systems through proper rear shock adjustment. Your bike's rear shocks are designed with multiple adjustment points (preload, compression damping, and rebound damping) each playing a critical role in how your motorcycle handles bumps, corners, and weight transfer.
Factory settings are generic compromises that rarely account for your specific weight, riding style, or typical load conditions. By learning to fine-tune these settings, you'll not only improve comfort but also enhance stability, reduce rider fatigue on long hauls, and even extend the life of your suspension components.
In this comprehensive guide, we'll walk you through the essential tips for adjusting your Harley Davidson rear shocks to achieve maximum comfort. From understanding what each adjustment does to providing step-by-step instructions and troubleshooting common issues, you'll have everything you need to dial in a smoother, more controlled ride that's perfectly tailored to you.

10 Things to Keep In Mind When Adjusting Rear Shocks
Before you start turning adjustment knobs and collars on your Harley's rear shocks, it's crucial to understand that suspension tuning is both an art and a science. Rushing through adjustments without proper preparation or documentation can leave you worse off than when you started and make it nearly impossible to return to a baseline setting.
The key to successful rear shock adjustment is a methodical, patient approach that accounts for multiple variables including rider weight, passenger weight, cargo load, tire pressure, and riding conditions.
Here are the essential things to keep in mind when adjusting your Harley Davidson rear shocks:
- Always document your starting settings. Before making any adjustments, write down your current shock settings including preload position, compression damping clicks, and rebound damping clicks. Take photos if necessary. This baseline documentation is your safety net if adjustments don't work out.
- Make one adjustment at a time. Resist the urge to change multiple settings simultaneously. Adjust only preload, compression, or rebound during each test ride, then evaluate the results. This methodical approach helps you understand exactly what each adjustment does to your ride quality.
- Check tire pressure first. Incorrect tire pressure can mask suspension problems or create false symptoms. Always verify your tires are at the manufacturer's recommended pressure before adjusting shocks. Under-inflated tires can mimic soft suspension, while over-inflated tires can feel harsh.
- Account for total load weight. Your suspension needs vary dramatically based on whether you're riding solo, two-up with a passenger, or fully loaded with luggage. Adjust preload specifically to accommodate your typical riding configuration. Many riders need different settings for touring versus daily commuting.
- Test on familiar roads. Make your evaluation rides on roads you know well, including sections with bumps, smooth pavement, and corners. Familiar terrain allows you to accurately compare before-and-after results without variables from unknown road conditions.
- Adjust both shocks equally. Unless you're compensating for a specific issue, always make identical adjustments to both rear shocks. Uneven settings can cause handling imbalances, uneven tire wear, and unpredictable behavior in corners.
- Use the correct tools. Don't use pliers or improvised tools on adjustment mechanisms. Invest in proper spanner wrenches or shock adjustment tools for your specific shock model. The wrong tools can damage precision threads and adjustment mechanisms.
- Allow suspension to settle. After making adjustments, take a short ride to let the suspension cycle and settle into its new settings. Initial impressions in your driveway don't tell the full story. You need real-world riding conditions.
- Consider ambient temperature. Shock performance can vary with temperature due to oil viscosity changes. Settings that feel perfect on a 75°F day might feel too stiff in cold weather or too soft when it's hot. Make adjustments during typical riding conditions for your area.
- Know your shock's adjustment range. Understanding the full range of adjustment clicks or collar positions helps prevent over-adjustment. Start with middle-range settings and work outward. Never force adjusters past their stops or you risk damaging internal components.
Now that we've covered some basic pointers to keep in mind when adjusting the rear shocks on your Harley, let's move on to the process of how you can make these adjustments.
How to Adjust Rear Shocks on a Harley Davidson
- Park the motorcycle on level ground and ensure it's stable using the kickstand or center stand.
- Locate the adjustment mechanisms on your rear shocks - typically preload collars at the top and damping adjusters (if equipped) at the bottom.
- Document current settings by counting clicks or measuring collar position before making changes.
- For preload adjustment: Use a spanner wrench to turn the preload collar. Clockwise increases preload (stiffer), counterclockwise decreases (softer).
- Make identical adjustments to both shocks - count turns or clicks to ensure symmetry.
- For compression damping (if equipped): Turn the adjustment screw clockwise to increase damping (firmer), counterclockwise to decrease (softer).
- For rebound damping (if equipped): Turn the adjustment screw clockwise for slower rebound, counterclockwise for faster rebound.
- Test ride on familiar roads for at least 10-15 minutes to evaluate the changes.
- Fine-tune based on feedback: If too harsh, reduce preload or damping. If too soft or bottoming out, increase preload or damping.
- Repeat the adjustment process until you achieve optimal comfort and control for your weight and riding style.

Adjusting Rear Shocks on Your Harley in Conclusion
Adjusting your Harley Davidson rear shocks for maximum comfort doesn't require a master mechanic's expertise, it simply demands a methodical approach, the right tools, and patience.
By understanding the key adjustment points (preload, compression damping, and rebound damping) and following a systematic process, you can transform your riding experience from uncomfortable and fatiguing to smooth and controlled. Remember that proper shock adjustment accounts for your specific weight, typical load conditions, and riding style. Factory settings are generic compromises that rarely deliver optimal performance. Take the time to document your baseline settings, make one adjustment at a time, and test thoroughly on familiar roads to ensure you'll achieve the perfect setup tailored to your needs.
At RWD V-Twin, we're committed to helping Harley riders unlock the full potential of their motorcycles. Whether you're dealing with harsh ride quality, excessive bottoming out, or that bouncy feeling that makes long trips exhausting, the solution often lies in proper rear shock adjustment.
Start with small changes, evaluate the results, and fine-tune until every mile becomes the smooth, confident ride you've been searching for.


